
03. Creating Chirps
You're now ready to start building your new application! Let's allow our users to post short messages called Chirps.
Models, migrations, and controllers
To allow users to post Chirps, we will need to create models, migrations, and controllers. Let's explore each of these concepts a little deeper:
- Models provide a powerful and enjoyable interface for you to interact with the tables in your database.
- Migrations allow you to easily create and modify the tables in your database. They ensure that the same database structure exists everywhere that your application runs.
- Controllers are responsible for processing requests made to your application and returning a response.
Almost every feature you build will involve all of these pieces working together in harmony, so the artisan make:model command can create them all for you at once.
Let's create a model, migration, and controller for our Chirps with the following command:
php artisan make:model -mc ChirpThis command will create three files for you:
-
app/Models/Chirp.php- The Eloquent model. -
database/migrations/<timestamp>_create_chirps_table.php- The database migration that will create your database table. -
app/Http/Controller/ChirpController.php- The HTTP controller that will take incoming requests and return responses.
Routing
We will also need to create URLs for our controller. We can do this by adding "routes", which are managed in the routes directory of your project.
Because we're using Livewire, we only need to define a single Route::get route to display our Chirp creation form and a listing of existing Chirps. Additionally, we are going to place this route behind two middleware:
- The
authmiddleware ensures that only logged-in users can access the route. - The
verifiedmiddleware will be used if you decide to enable email verification.
<?php +use App\Http\Controllers\ChirpController; use Illuminate\Support\Facades\Route; Route::view('/', 'welcome');+ +Route::get('chirps', [ChirpController::class, 'index'])+ ->middleware(['auth', 'verified'])+ ->name('chirps'); Route::view('dashboard', 'dashboard') ->middleware(['auth', 'verified']) ->name('dashboard'); Route::view('profile', 'profile') ->middleware(['auth']) ->name('profile'); require __DIR__.'/auth.php';Let's test our route and controller by returning a test message from the index method of our new ChirpController class:
<?php namespace App\Http\Controllers; -use Illuminate\Http\Request; +use Illuminate\Http\Response; class ChirpController extends Controller {+ /**+ * Display a listing of the resource. + */+ public function index(): Response+ {+ return response('Hello, World!');+ } }If you are still logged in from earlier, you should see your message when navigating to http://localhost:8000/chirps, or http://localhost/chirps if you're using Sail!
Livewire
Not impressed yet? Let's update the index method of our ChirpController class to render a Blade view:
<?php namespace App\Http\Controllers; -use Illuminate\Http\Response;+use Illuminate\View\View; class ChirpController extends Controller { /** * Display a listing of the resource. */- public function index(): Response+ public function index(): View {- return response('Hello, World!');+ return view('chirps', [+ //+ ]); } }We can then create our Blade template and include a Livewire component that will render our form for creating new Chirps:
<x-app-layout> <div class="max-w-2xl mx-auto p-4 sm:p-6 lg:p-8"> <livewire:chirps.create /> </div></x-app-layout>Next, let's create the Livewire component to render the form. For that, you may use the make:volt Artisan command.
Note that the snippet below offers two different ways to create the component: one using a Class API and the other using a Functional API. You will see both APIs throughout this tutorial, and you can choose the style of Livewire development that you prefer:
php artisan make:volt chirps/create --classphp artisan make:volt chirps/createThis command will create a new Livewire component at resources/views/livewire/chirps/create.blade.php.
Let's update the Livewire component to display a form:
<?php use Livewire\Volt\Component; new class extends Component {+ public string $message = ''; }; ?> <div>- // + <form wire:submit="store"> + <textarea+ wire:model="message"+ placeholder="{{ __('What\'s on your mind?') }}"+ class="block w-full border-gray-300 focus:border-indigo-300 focus:ring focus:ring-indigo-200 focus:ring-opacity-50 rounded-md shadow-sm"+ ></textarea>+ + <x-input-error :messages="$errors->get('message')" class="mt-2" />+ <x-primary-button class="mt-4">{{ __('Chirp') }}</x-primary-button>+ </form> </div> <?php use function Livewire\Volt\{state}; +state(['message' => '']); ?> <div>- // + <form wire:submit="store"> + <textarea+ wire:model="message"+ placeholder="{{ __('What\'s on your mind?') }}"+ class="block w-full border-gray-300 focus:border-indigo-300 focus:ring focus:ring-indigo-200 focus:ring-opacity-50 rounded-md shadow-sm"+ ></textarea>+ + <x-input-error :messages="$errors->get('message')" class="mt-2" />+ <x-primary-button class="mt-4">{{ __('Chirp') }}</x-primary-button>+ </form> </div>That's it! Refresh the page in your browser to see your new form rendered in the default layout provided by Breeze!
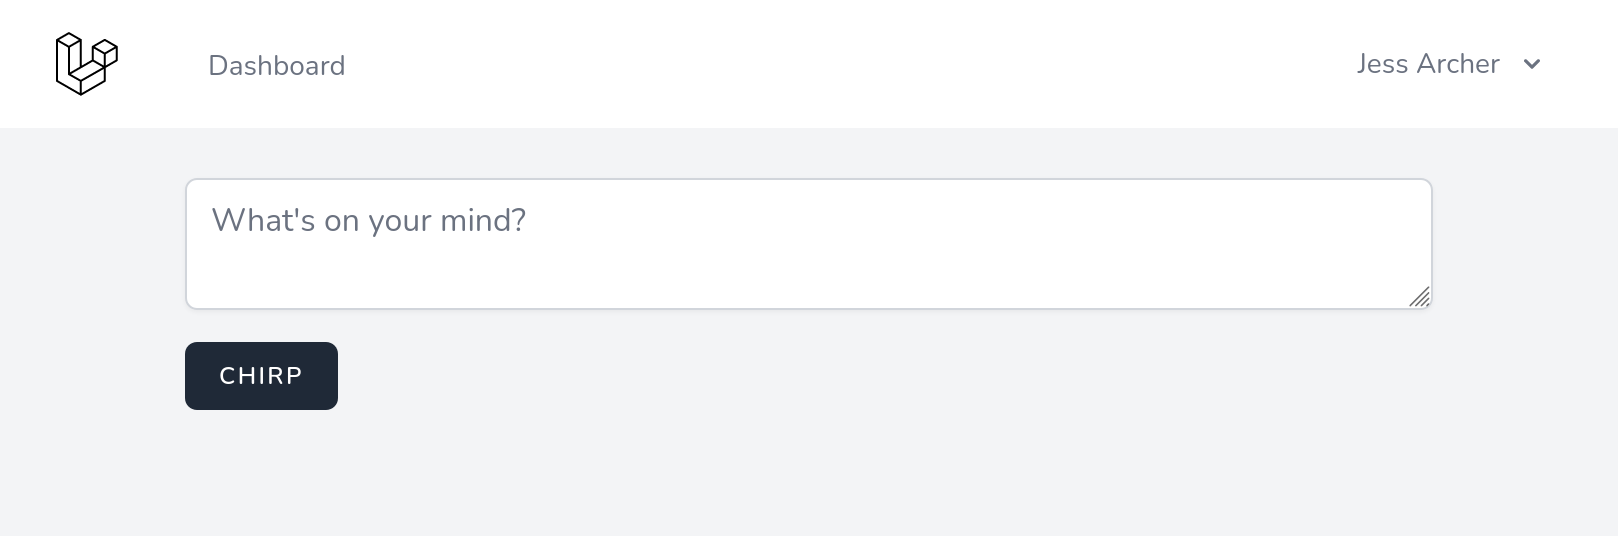
If your screenshot doesn't look quite like the above, you may need to stop and start the Vite development server for Tailwind to detect the CSS classes in the new file we just created.
From this point forward, any changes we make to our Blade templates will be automatically refreshed in the browser whenever the Vite development server is running via npm run dev.
Navigation menu
Let's take a moment to add a link to the navigation menu provided by Breeze.
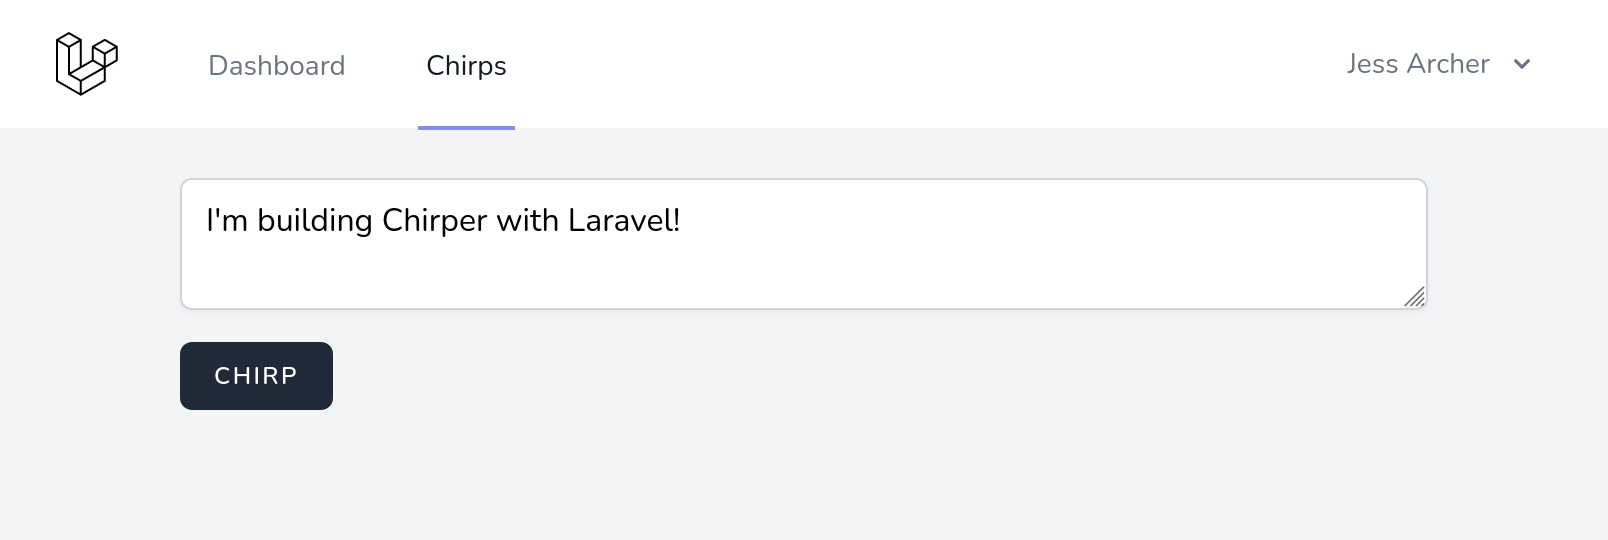
Update the navigation.blade.php component provided by Breeze to add a menu item for desktop screens:
<div class="hidden space-x-8 sm:-my-px sm:ml-10 sm:flex"> <x-nav-link :href="route('dashboard')" :active="request()->routeIs('dashboard')" wire:navigate> {{ __('Dashboard') }} </x-nav-link>+ <x-nav-link :href="route('chirps')" :active="request()->routeIs('chirps')" wire:navigate>+ {{ __('Chirps') }}+ </x-nav-link> </div>And also for mobile screens:
<div class="pt-2 pb-3 space-y-1"> <x-responsive-nav-link :href="route('dashboard')" :active="request()->routeIs('dashboard')" wire:navigate> {{ __('Dashboard') }} </x-responsive-nav-link>+ <x-responsive-nav-link :href="route('chirps')" :active="request()->routeIs('chirps')" wire:navigate>+ {{ __('Chirps') }}+ </x-responsive-nav-link> </div>Saving the Chirp
Our form has been configured to invoke the store action when the Chirp button is clicked. Let's add a store action to our chirp.create component to validate the data and create a new Chirp.
<?php +use Livewire\Attributes\Validate; use Livewire\Volt\Component; new class extends Component {+ #[Validate('required|string|max:255')] public string $message = '';+ + public function store(): void+ {+ $validated = $this->validate();+ + auth()->user()->chirps()->create($validated);+ + $this->message = '';+ } }; ?> <div> <form wire:submit="store"> <textarea wire:model="message" placeholder="{{ __('What\'s on your mind?') }}" class="block w-full border-gray-300 focus:border-indigo-300 focus:ring focus:ring-indigo-200 focus:ring-opacity-50 rounded-md shadow-sm" ></textarea> <x-input-error :messages="$errors->get('message')" class="mt-2" /> <x-primary-button class="mt-4">{{ __('Chirp') }}</x-primary-button> </form> </div> <?php -use function Livewire\Volt\{state};+use function Livewire\Volt\{rules, state}; state(['message' => '']);+ +rules(['message' => 'required|string|max:255']);+ +$store = function () {+ $validated = $this->validate();+ + auth()->user()->chirps()->create($validated);+ + $this->message = '';+}; ?> <div> <form wire:submit="store"> <textarea wire:model="message" placeholder="{{ __('What\'s on your mind?') }}" class="block w-full border-gray-300 focus:border-indigo-300 focus:ring focus:ring-indigo-200 focus:ring-opacity-50 rounded-md shadow-sm" ></textarea> <x-input-error :messages="$errors->get('message')" class="mt-2" /> <x-primary-button class="mt-4">{{ __('Chirp') }}</x-primary-button> </form> </div>Using Livewire's Validate attribute, we're leveraging Laravel's powerful validation features to ensure that the user provides a message that doesn't exceed the 255 character limit of the database column we'll be creating.
We're then creating a record that will belong to the logged in user by utilizing a chirps relationship. We will define that relationship soon.
Finally, we are also clearing the message form field value.
Creating a relationship
You may have noticed in the previous step that we called a chirps method on the auth()->user() object. We need to create this method on our User model to define a "has many" relationship:
<?php
namespace App\Models; // use Illuminate\Contracts\Auth\MustVerifyEmail; use Illuminate\Database\Eloquent\Factories\HasFactory;+use Illuminate\Database\Eloquent\Relations\HasMany; use Illuminate\Foundation\Auth\User as Authenticatable; use Illuminate\Notifications\Notifiable; use Laravel\Sanctum\HasApiTokens; class User extends Authenticatable {
use HasApiTokens, HasFactory, Notifiable; /** * The attributes that are mass assignable. * * @var array<int, string> */ protected $fillable = [ 'name', 'email', 'password', ]; /** * The attributes that should be hidden for serialization. * * @var array<int, string> */ protected $hidden = [ 'password', 'remember_token', ]; /** * Get the attributes that should be cast. * * @return array<string, string> */ protected function casts(): array { return [ 'email_verified_at' => 'datetime', 'password' => 'hashed', ]; } + public function chirps(): HasMany+ {+ return $this->hasMany(Chirp::class);+ } }Mass assignment protection
Passing all of the data from a request to your model can be risky. Imagine you have a page where users can edit their profiles. If you were to pass the entire request to the model, then a user could edit any column they like, such as an is_admin column. This is called a mass assignment vulnerability.
Laravel protects you from accidentally doing this by blocking mass assignment by default. Mass assignment is very convenient though, as it prevents you from having to assign each attribute one-by-one. We can enable mass assignment for safe attributes by marking them as "fillable".
Let's add the $fillable property to our Chirp model to enable mass-assignment for the message attribute:
<?php
namespace App\Models; use Illuminate\Database\Eloquent\Factories\HasFactory; use Illuminate\Database\Eloquent\Model; class Chirp extends Model {
use HasFactory; + protected $fillable = [+ 'message',+ ]; }You can learn more about Laravel's mass assignment protection in the documentation.
Updating the migration
During the creation of the application, Laravel already applied the default migrations that are included in the database/migrations directory. You may inspect the current database structure by using the php artisan db:show and php artisan db:table commands:
php artisan db:showphp artisan db:table usersSo, the only thing missing is extra columns in our database to store the relationship between a Chirp and its User and the message itself. Remember the database migration we created earlier? It's time to open that file to add some extra columns:
<?php
use Illuminate\Database\Migrations\Migration; use Illuminate\Database\Schema\Blueprint; use Illuminate\Support\Facades\Schema; return new class extends Migration { /** * Run the migrations. */ public function up(): void { Schema::create('chirps', function (Blueprint $table) { $table->id();+ $table->foreignId('user_id')->constrained()->cascadeOnDelete();+ $table->string('message'); $table->timestamps(); }); }
/** * Reverse the migrations. */ public function down(): void { Schema::dropIfExists('chirps'); } };We haven't migrated the database since we added this migration, so let's do it now:
php artisan migrateTesting it out
We're now ready to send a Chirp using the form we just created! We won't be able to see the result yet because we haven't displayed existing Chirps on the page.
If you leave the message field empty, or enter more than 255 characters, then you'll see the validation in action.
Artisan Tinker
This is great time to learn about Artisan Tinker, a REPL (Read-eval-print loop) where you can execute arbitrary PHP code in your Laravel application.
In your console, start a new tinker session:
php artisan tinkerNext, execute the following code to display the Chirps in your database:
App\Models\Chirp::all();=> Illuminate\Database\Eloquent\Collection {#4512 all: [ App\Models\Chirp {#4514 id: 1, user_id: 1, message: "I'm building Chirper with Laravel!", created_at: "2022-08-24 13:37:00", updated_at: "2022-08-24 13:37:00", }, ], }You may exit Tinker by using the exit command, or by pressing Ctrl + c.